Showing posts with label songo relays. Show all posts

Sunday, July 26, 2015

Two Relay Board Activated By Low Signal Optocouplers

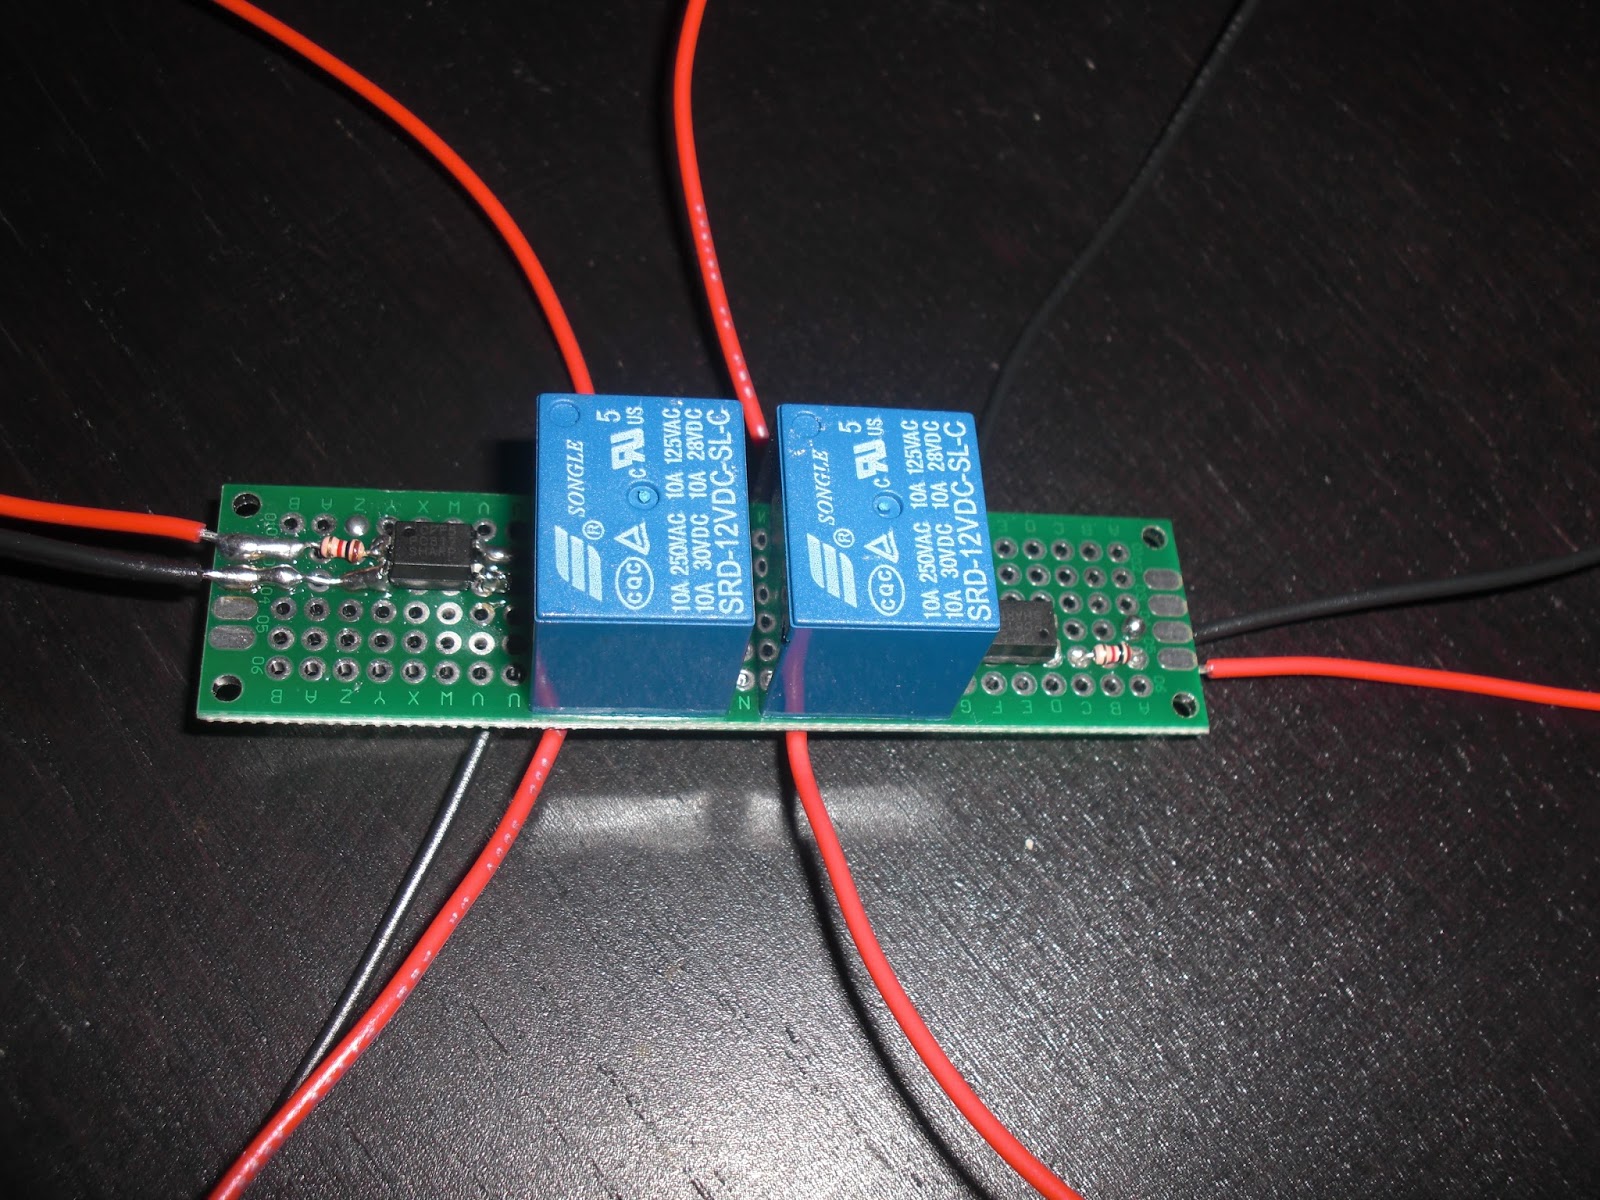
There we go, I have a small PCB board set up with two 12V Mini 10 Amp Songo Relays that are each activated separately by two Optocouplers. I only need one side of this board for right now to complete the wiring scenario I mentioned in my last post for turning on the Lower Console switch lights as part of the Knight Rider dash start up sequence.
The Red and Black wires you see coming in from the left side end of the board will ultimately be spliced into the wires that connect from the Voice Box to the last set of lights in the Top Countdown indicators, this way when the Knight Rider V.B. activates those lights a signal will be sent to the Optocoupler, activating my Relay and closing the power connection to the Lower Console switch lights. I did a little tweaking to my diagram so here it is again just so you can see my minor tweaks ;)

Tuesday, July 7, 2015

DTMF Tone Request Experimentations


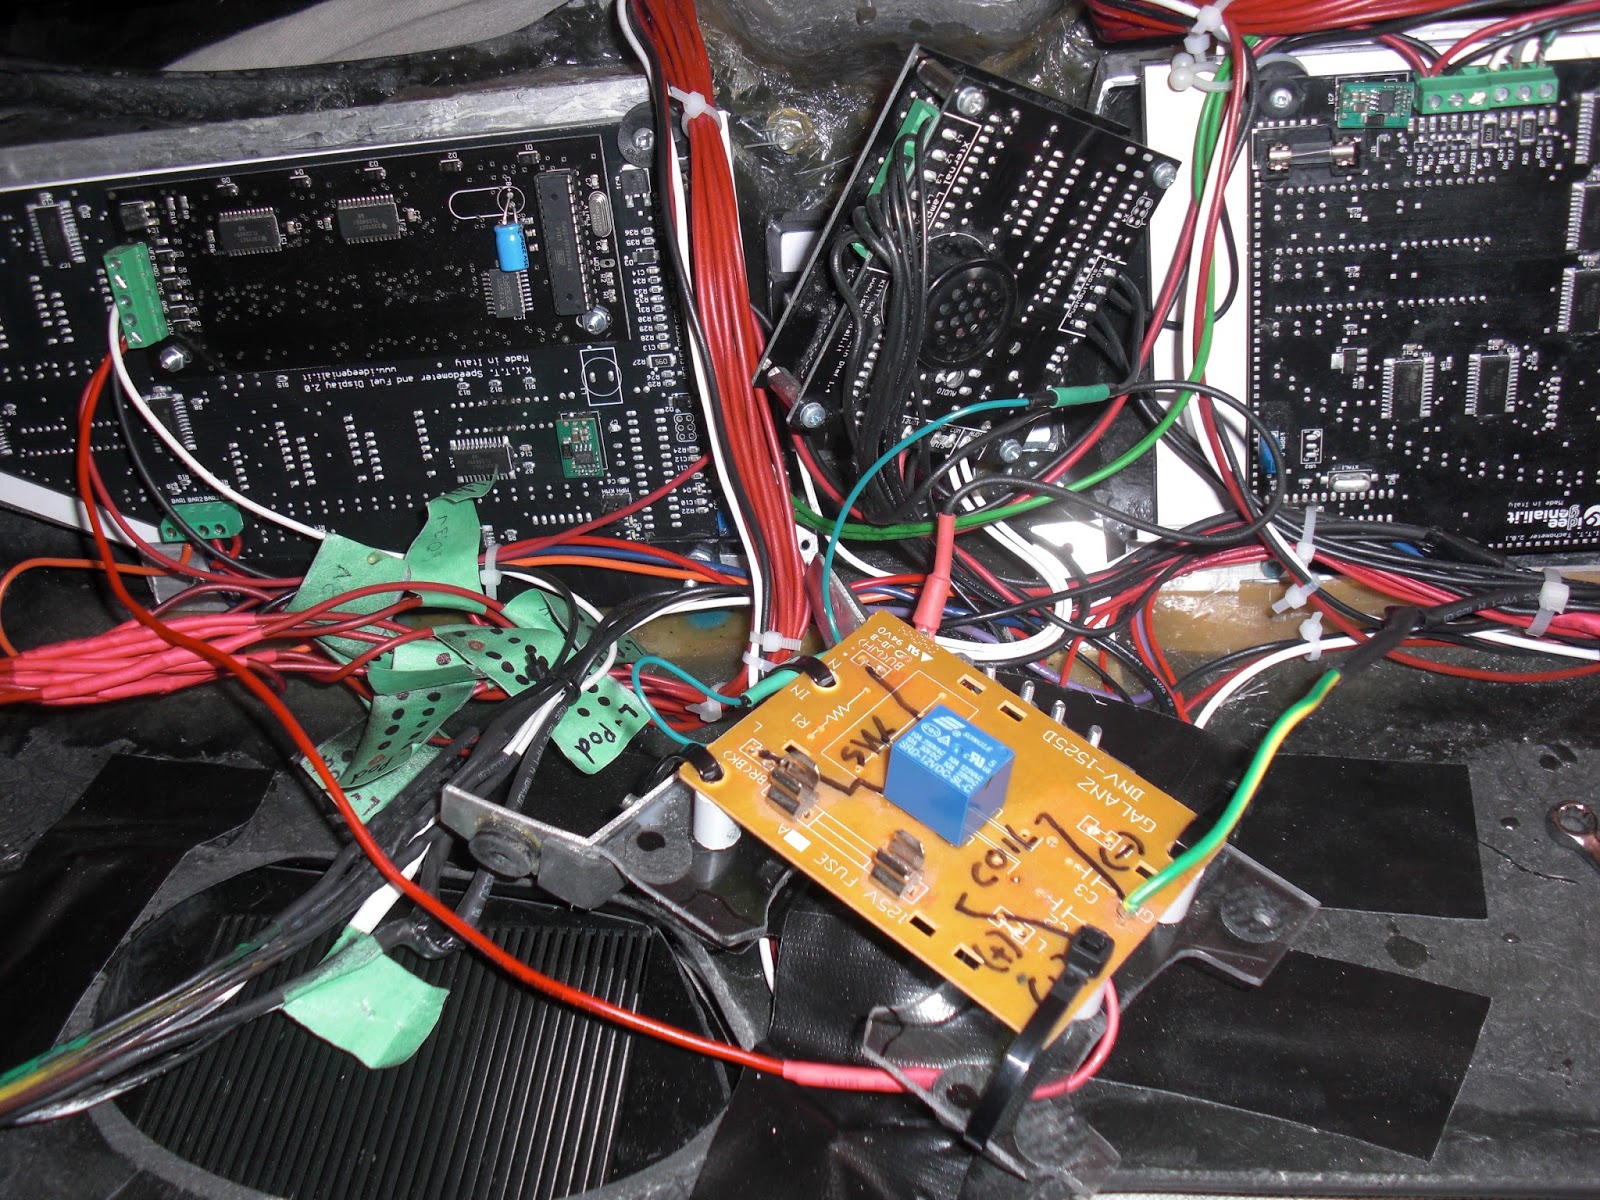
In making sure that I well isolate the Voice Box's DTMF tone request from any momentary buttons I have I figured I would rig up a mini Songo 12V Relay very close to the Voce Box. Now what happens here is that when a DTMF Tone request is called by any momentary button I have hooked up to a wire that I am calling "DTMF Tone Request" THAT wire goes to the magnetic coil of this mini Songo 12V Relay's Ground (-), the other side of the magnetic coil goes to 12V (+). So this then trips the Relay's internal isolated switch which I then have connected to both the Voice Box's Ground (-) and also the DTMF Tone Request port. You will have to excuse my somewhat over sized piece of PCB board it was all I had kicking around that I could use to mount this small relay onto and connect wires too. I'll most likely change it later when I get some smaller pieces of PCB Proto-Board. The wires from the Switch Pods that request the DTMF tone I just have going directly into the Voice Box's DTMF Tone request port.


Now the other part of today's fun was to wire up my Relays board for some experimentation just to make sure that I am understanding correctly just what is going on with this thing and how it interacts with my buttons. All of this stuff gets pretty complicated if you are new to electronics like me. ;) My latest video that I posted to my blog explains best and visually how I have it all hooked up. But basically the Ground pulse buttons from my Space Matt buttons go into the ports on the board that connect to the Diodes, they connect to the DTMF Tone Request wire and also to the individual relays on the board. Each relays gets it's own ground pulse from each of the Space Matt buttons activating the Relays internal switch which I can hook up to any device I want to activate, in my case 5 of the Space Matt buttons are simply activating buttons that control the setting for my LCD screen. Although I have not yet hooked it up, a 6th button will cycle the Message Centre while producing a DTMF tone with each press of the button. The rest of the Space Matt buttons I don't have plans for just yet.

My Voice Projection unit activation button is wired up the same way as the Dash Power Button and makes a connection to ground to activate the Step Relay, this one was a little more tricky. You can see in the image above (middle left) that branching off from the wire that comes from the Normally Open terminal of the V.P. power button that I have placed a Diode in-line connecting to the DTMF Tone Request block.... which I moved onto the back of my Relays Board. Without the Diode in place the Space Matt buttons would activate the Step Relay for the Voice Projection unit as well, not good, so the Diode sure takes care of that as it only allows current to travel in one direction... taking me a while to get the hang of that but it works and it's cool... gotta love electronics ;)

So now with all of this in place I'll have to test it out on the Voice Box once the replacement I.C. Chip 01 comes in the mail. If everything works out well, and so far I can't see what not as a Relay does what a Relay does ;) But as I say if all goes well I can look into experimenting with the Optocouplers when they arrive and see if I can make a set up like this that takes up a lot less space. This would be fine if I only wanted to use a small amount of my Space Matt buttons but I can see eventually wanting to use more down the road as I trick out K.I.T.T. with more cool gadgets ;)   


Friday, June 26, 2015

Mini Relays Board For Space Matt Buttons Part 2

I id some more work on my mini relays board for my Space Matt buttons. Thanks to Andrea Lannaccone one of the very electronics savvy Knight Rider people on Face Book who put me hip to using Diodes in my circuit design I can now get away with using half the relays I figured I would be for my Space Matt buttons. He was kind enough to update my original diagram I had made that showed how I was going to use a series of isolated relays to generate the needed ground pulse for the Voice box's DTMF tone generator, and although it would have worked it would have been a lot of relays, thankfully very small mini Songo relays but lots of them. But now thanks to Andrea I can get away with half of what I would have ended up using. He had another method that involved using what is called an "Optocoupler" but it is currently beyond my level of understanding electronics wise so for now I need to stick with what I can understand. Update later as my knowledge base increases, lol well that's the plan anyways. As long as it's safe and wired right I'm happy.

Here is a copy of the newly updated wiring scheme that Andrea was kind enough to do for me. I have done some simple test with my relays board with some Diodes soldered onto the board and it seems like it should work as the Diodes only allow electrical current to flow in one direction so it should work. When I get around to doing a test in the car I'll do a demo video and we'll see how that works. ;)

Wednesday, June 24, 2015

Mini Relays Board For Space Matt Buttons

I started soldering my mini Songo 12V Relays to the piece of Proto-Board I had for my Space Matt buttons yesterday. It was a bit of a pain to get the relays to sit straight on the board because the pins on the relays don't match up well with the holes in the Proto-Board, so they look like they sit at a slight angle. But it works and that's the main thing. So once this assembly is done I'll be able to wire this up to my Space Matt buttons and use some of the relays on the board to request a DTMF tone from the Knight Rider World Voice Box.

Tuesday, June 23, 2015

12V Mini PCB Relays Arrive

FINALLY! The mini Songo 12V PCB Relays arrived!! There was a slight shipment issue according to the eBay seller so I waited a much longer time for delivery but luckily the first batch of 10 have arrived so now I can begin work on my Relay board for my Lower Console makeshift Space Matt buttons I had made out of the old calculator. You may remember from an earlier post. I basically want the Space Matt buttons to activate the DTMF tones generated by the Knight Rider World Voice Box. Now given the configuration of how my Space Matt buttons are wired and that I am NOT an electronics expert by ANY means this was the best and easiest solution I could come up with. Now these Songo Relays are very tiny and will more than do the job needed by my Space Matt buttons to activate one Relay for the DTMF tone for each button and also another Relay for any given function I choose.

Now like I say I had worked out a diagram that should do the job needed for my Space Matt buttons. As you can see here the DTMF tone request pulse is isolated from the button device function activation pulse. Someone more electronics savvy may have another option but this was what I came up with given my limited electronics knowledge and the way my Space Matt buttons were configured. The Songo relays are very small so I can get a lot of them into a small space by soldering them onto some Proto Board and wiring them in accordance to my diagram.